Beginner Treadmill Workout Guide You Can Start Today
Start a beginner treadmill workout with confidence. Learn safe warm-ups, intervals vs steady-state, progression tips, and sample sessions you can repeat.

You're standing on a treadmill, staring at a console covered in buttons, wondering whether you should press Start, raise the speed, or copy the person walking uphill beside you. The belt feels faster than expected, your hands reach for the rails, and five minutes suddenly seems like a long time.
A good beginner treadmill workout doesn't begin with running, steep incline, or a viral challenge. It begins with a manageable amount of time, a comfortable walking pace, and a plan you can repeat. A beginner structure built around short warm-up, walking, and cool-down blocks creates a clear path toward longer sessions, including the 5-20-5 and 5-30-5 progressions recommended by Texas A&M's treadmill guidance.
The priority for your first week is simple: finish the planned minutes, recover well, and return for the next session. Speed and incline can wait until your body knows how to move comfortably on the belt.
What a First Treadmill Session Should Feel Like
Your first session may feel awkward before it feels difficult. The console has unfamiliar buttons, the moving belt creates a sensation you don't get while standing on solid ground, and you may feel as if everyone in the gym is watching. Most are focused on their own workout, and the treadmill gives you something valuable as a beginner, control over speed, incline, and stopping.
Start by standing with your feet on the side rails. Clip on the safety key, select a manual walking mode, and begin at an easy pace. Don't jump onto a moving belt or start at a speed you haven't tested. The beginner treadmill safety guidance recommends starting on the side rails, using the safety key, and judging effort through breathing and joint comfort rather than chasing a number.
Your first-session success markers
A successful session isn't the one with the highest speed. It's the one you can complete without panic, poor posture, or pain.
Look for these signals:
Breathing: Your breathing should be noticeably raised, but controlled enough for short sentences.
Effort: A light sweat can develop as the session continues, but you shouldn't feel as if you're sprinting to survive.
Joints: Muscle effort is acceptable. Sharp pain in the knees, hips, ankles, or back isn't something to push through.
Balance: You should be able to release the rails and walk with a natural arm swing.
Recovery: Your breathing should begin settling when you reduce the speed.
A moderate walking effort generally allows conversation but not singing, a practical benchmark described in Consumer Reports' treadmill safety guidance. If you can't speak comfortably, lower the speed. If you feel dizzy, unsteady, or experience joint pain, stop the belt safely and reassess.
Practical rule: Your first win is completing the minutes you planned, not proving how fast you can go.
Avoid gripping the rails tightly, staring down at the belt, or accelerating because the display makes the current speed look unimpressive. Keep your eyes forward, relax your shoulders, and let the machine feel predictable. Consistency across the first week will teach you more than an exhausting first day.
Warm-Up, Main Set, and Cool-Down Made Simple
A treadmill session becomes easier to follow when you divide it into three jobs. The warm-up prepares your movement, the main set provides the training stimulus, and the cool-down gives your breathing and circulation time to settle.

Set up the console first
Choose manual mode rather than a hill or interval program. Put the incline at zero, set the speed before pressing start if the machine allows it, and stand on the side rails until the belt reaches a manageable pace. Use the handrails only for balance during a speed change, not as a permanent support.
The Texas A&M beginner pathway suggests starting around 2 to 2.5 mph with a 1% incline, then increasing workout time by a few minutes every few days. For a nervous first session, a flat setting is also reasonable. The correct starting point is the one that lets you walk smoothly.
Use this three-block structure
Warm-up, 3 to 5 minutes: Walk at 2.0 to 3.0 mph with zero incline. Let your ankles, knees, hips, and shoulders settle into a natural rhythm. Your breathing should remain easy.
Main set, 5 to 15 minutes: Move toward 3.0 to 3.5 mph on flat terrain or a gentle 1% to 2% incline only if the pace feels stable. Stay at an effort where you can speak in full sentences.
Cool-down, 3 to 5 minutes: Reduce the speed to about 2.0 mph or another easy walking pace. Allow your breathing to slow gradually rather than stepping off immediately.
The warm-up gradually raises cardiovascular demand and lets your joints move through repeated flexion without an abrupt load. The main set is where you accumulate useful walking time. The cool-down keeps you moving while your heart rate and breathing return toward normal, and it helps you transition from the moving belt to stationary ground.
Skipping the cool-down is a common mistake, especially when the workout feels easy. Keep it in the plan anyway. The sample sessions below use the same structure, so you won't need to improvise at the console.
Steady-State Walking Versus Walking Intervals
Steady-state walking and walking intervals can both work for a beginner, but they solve different problems. A continuous walk keeps your attention on one pace and makes progress easy to measure by total minutes. Intervals give you variety and let you practice controlled pace changes without immediately adding hills or running.
For the first two sessions, choose steady-state walking. You'll learn how the belt feels, how much space you need, and which pace keeps your posture relaxed. Once that feels routine, intervals can make shorter workouts more engaging.
Factor | Steady-State Walking | Walking Intervals |
|---|---|---|
Structure | One continuous walking pace during the main set | Alternating brisk and recovery walking |
Typical effort | Comfortable and consistent | Briefly more demanding, followed by easier movement |
Mental demand | Simple, predictable pacing | More console changes and clock-watching |
Progress tracking | Total walking minutes and comfortable pace | Number of work rounds and recovery quality |
Recovery needs | Usually easier to manage | Can create more fatigue if the brisk blocks are too fast |
Best use | First sessions and habit building | Later beginner sessions when flat walking feels familiar |
When steady-state wins
Steady-state walking is the better choice when you're anxious, returning after inactivity, or short on mental energy. Set a comfortable speed, keep the incline flat, and focus on relaxed breathing. The lower complexity also makes it easier to notice whether your shoes, stride, or posture are creating discomfort.
This format supports the article's central progression, time before intensity. You can add minutes without changing the movement pattern, which makes it easier to identify what your body tolerates.
When intervals make sense
Walking intervals suit people who find continuous walking monotonous or have limited time. A beginner version can alternate 1 to 2 minutes around 3.5 to 4.0 mph with 1 to 2 minutes around 2.5 to 3.0 mph, provided the brisk segment still feels like walking rather than a scramble.
Don't begin with high-speed running intervals. Learn to change pace without grabbing the rails, leaning backward, or losing your foot placement. Keep running intervals out of the plan until your walking form feels automatic for several weeks.
Two Sample Workouts You Can Repeat This Week
These two sessions give you a simple choice without forcing intensity. Workout A is the default when you're new, tired, or still learning the console. Workout B adds pace changes while keeping the incline flat, so it's useful when you feel recovered and want more variety.
Workout A versus Workout B
Block | Workout A: Steady-State | Workout B: Walking Intervals |
|---|---|---|
Warm-up | 3 minutes at 2.5 to 3.0 mph, 0% incline, RPE 2 to 3 | 3 minutes at 2.5 mph, 0% incline, RPE 2 to 3 |
Main work | 14 minutes at 3.0 to 3.5 mph, 0% incline, RPE 4 to 5 | Six rounds of 90 seconds at 3.0 mph and 60 seconds at 2.5 mph, 0% incline, RPE 3 to 5 |
Cool-down | 3 minutes at 2.0 mph, 0% incline, RPE 2 | 3 minutes at 2.0 mph, 0% incline, RPE 2 |
Total time | 20 minutes | 22 minutes |
Choose it when | You want the simplest repeatable session | Your legs feel recovered and pace changes sound manageable |
Workout A for a calm first week
Start on the side rails, confirm the safety key is attached, and begin the three-minute warm-up at 2.5 to 3.0 mph with no incline. During the 14-minute main set, choose a speed between 3.0 and 3.5 mph that allows steady conversation and keeps your stride quiet. Finish with three minutes at 2.0 mph.
Keep the whole workout around RPE 4 to 5, meaning it feels purposeful but controlled. If 3.0 mph already pushes you beyond that range, stay slower. The exact number on the console matters less than maintaining form and completing the block.
Workout B for a recovered day
Warm up for three minutes at 2.5 mph on a flat belt. Then complete six rounds of 90 seconds at 3.0 mph, followed by 60 seconds at 2.5 mph, with the incline held at zero throughout. End with three minutes at 2.0 mph.
The brisk segments shouldn't force you to lean on the rails. If the pace change feels abrupt, use a smaller difference between work and recovery speeds. You can also choose Workout A after a poor night of sleep or a demanding work shift, and reserve Workout B for a time of day when you feel alert.
For ideas on adapting treadmill walking to a weight-loss goal, use this treadmill workout resource for weight loss, but keep your first week focused on repeatability rather than exhausting calorie targets.
Progressing Week by Week Without Burning Out
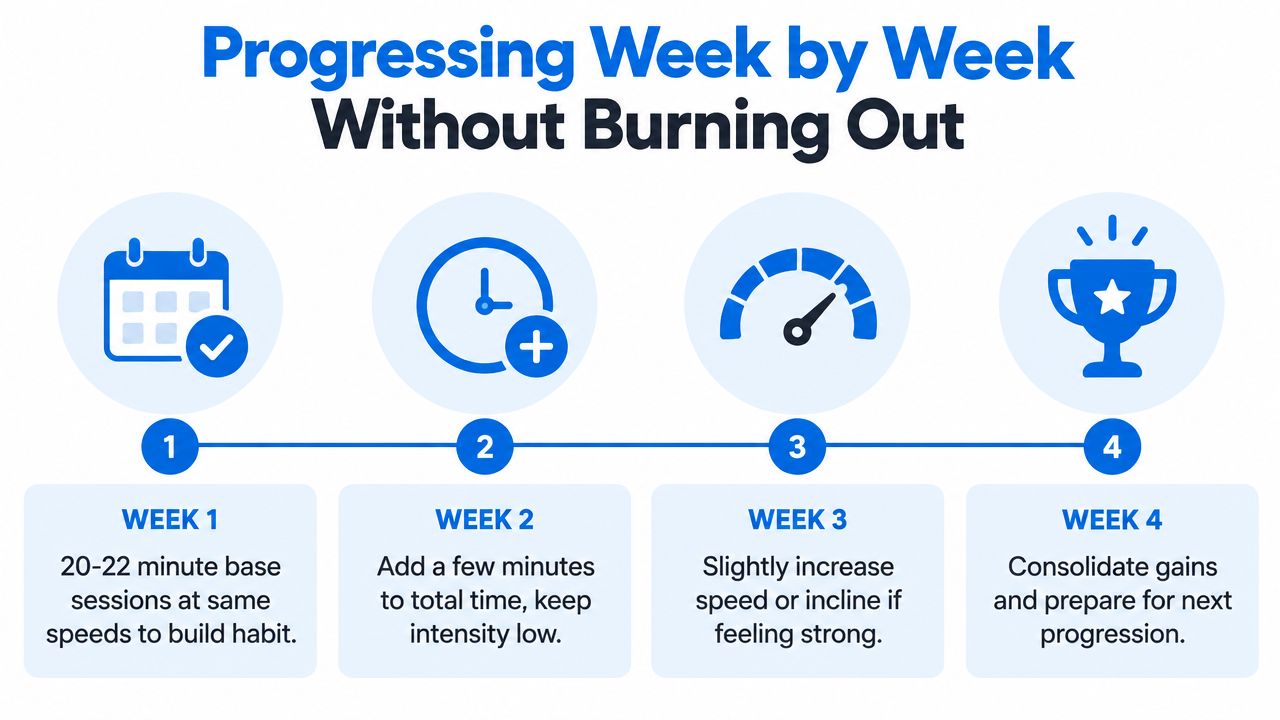
Progression should make the routine more sustainable, not turn every session into a test. Keep the belt flat while you build time, and change only one training variable when you're ready.
Week | Main adjustment | What stays controlled |
|---|---|---|
Week 1 | Repeat the 20 to 22-minute base sessions at the same speeds | Flat incline and conversational effort |
Week 2 | Add one two-minute block to the end of each session | Keep the familiar pace |
Week 3 | Add a 0.5 mph bump to either the main set or work intervals | Don't raise speed and incline together |
Week 4 | Extend total session length to 25 to 28 minutes | Keep speed and incline flat if needed |
If you miss a workout, you haven't failed and you don't need to restart the entire plan. Return to the last session you completed comfortably, then continue. A missed day is a recovery event, not a reason to double the next workout.
Use this rule: add time for two weeks, then add a small speed or incline change, and repeat. The practical measure is your accumulated time on your feet and your ability to recover before the next session. A 2025 peer-reviewed treadmill-walking study reported increases in VO₂max alongside reductions in systolic blood pressure and blood glucose, including a 16.1% VO₂max increase, 9.6% systolic blood-pressure reduction, and 16.9% blood-glucose reduction in the study program, as reported in the published study. Those findings support the value of consistent walking, not the idea that beginners need punishing intensity.
When to Add Incline and Speed to Your Walks
Incline is a progression, not a personality test. A steep setting can make an ordinary walk feel like a demanding hill session before your calves, Achilles tendons, knees, and cardiovascular system are ready for it.
Stay at flat walking or a gentle 1% to 2% incline until you've completed at least three weeks of flat walking sessions without joint pain or excessive post-workout fatigue. That trigger is deliberately conservative. If you're deconditioned, heavier, returning after illness, or rebuilding after an injury, you may need more time.
Use one change at a time
A sensible progression looks like this:
Build a consistent walking base with flat sessions.
Add 0.5 to 1.0 mph to the main set if your current pace feels sustainable.
Introduce incline in 0.5% increments after the faster pace feels controlled.
Combine speed and incline only after your body has handled both separately for a sustained period.
The treadmill's control makes it tempting to keep pressing buttons. Resist that urge. If raising the incline shortens your stride, causes you to grip the rails, or changes your breathing from controlled to strained, lower it immediately.
Viral formats can be useful for experienced exercisers, but they aren't universal entry points. Current coverage of 12-3-30, which uses 12% incline, 3 mph, and 30 minutes, sits alongside beginner guidance that recommends flat terrain and shorter 10 to 25-minute walks, as described by Nike's treadmill walking guide. The trade-off is clear: steep fixed-incline routines create intensity quickly, while time-based flat walking gives novices more room to learn form and recover.
For a broader look at how cardio tools fit into a training setup, see this guide to cardio workout equipment. Your treadmill doesn't need to imitate an advanced challenge to be effective.
Safety, Form, and Recovery Habits That Stick
Good treadmill technique starts before the belt moves. Place the machine where you can step off safely, check that the belt is fully stopped, attach the safety key to your clothing, and identify the stop button. Begin from zero or a very low speed, then increase gradually while standing on the side rails.
Keep your body over the belt
Use these cues while walking:
Eyes forward: Look toward the front of the room instead of staring at your feet or the console.
Shoulders relaxed: Let your arms move naturally rather than bracing through the upper body.
Arms free: Swing your arms comfortably, with the elbows bent rather than locking them against your sides.
Foot placement underneath you: Aim for your foot to land under your hips instead of reaching far ahead.
Ankle-led posture: Lean very slightly from the ankles if needed. Don't fold forward from the waist.
Rails for balance only: Holding them tightly can change your posture and hide whether the speed is too high.
If you need the rails to stay upright, the belt is moving too quickly or the incline is too demanding. Lower the setting instead of trying to overpower the machine.
Recover on purpose
Finish with two to three minutes of slow walking, even after an easy session. Then stretch the calves and hamstrings for 20 to 30 seconds per stretch, without bouncing. Drink roughly 250 to 500 ml of water, and choose a source containing protein and carbohydrate within an hour if you need a meal or snack after training.
Skip the workout if you're ill, experiencing joint pain, or have slept less than five hours. The practical advice in this guide to exercising when tired is useful here, because fatigue can reduce coordination and make a familiar pace feel less controlled.
Log the session in a note on your phone: total minutes, speed, incline, RPE, and any discomfort. A cadence of three or four sessions per week, with at least one full rest day, gives you room to alternate treadmill walking with light strength work. Don't stack hard treadmill blocks every day and call it discipline. Recovery is part of the program.
Empire Athletics offers 24/7 gym access, modern cardio equipment, and certified one-on-one personal training at locations in Leominster, Lunenburg, and Webster, Massachusetts. If you want help turning your first treadmill sessions into a sustainable plan, visit Empire Athletics and speak with the team about training support that fits your schedule.